
 VPN connection for Mac OS
The MacOS X operating system already includes a VPN client. There is no need for additional software.
Requirements
To connect to the VPN service ask your system administrator:
- File <customer>-VPNCA.crt
- VPN Certification Authority.
- This file can be downloaded from the SSL Certificates, page.
- It can be identified as "VPN INTERNAL CA CERTIFICATE"
- VPN IP address.
- It is the same IP address used to access the Cloud management system.
- It is the IP address corresponding to the name of your Cloud-Bricks node.
- You can get it by resolving the name of your node through
the nslookup command, for example:
#nslookup sample1.cloud-bricks.net
- The following information can be obtained from the VPN Users page.
- File <user>-vpn.p12 (User certificate for the VPN connection).
- File <user>-vpn.key (Private key connection)
- Username and password with permissions to connect to the VPN.
VPN client in MacOS
Create VPN connection
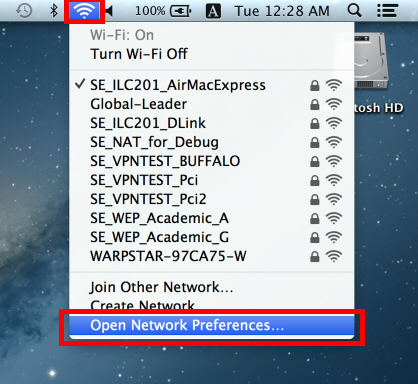
To create a new connection on Mac, just click on the network
icon. Then click on "Open Network Preferences"
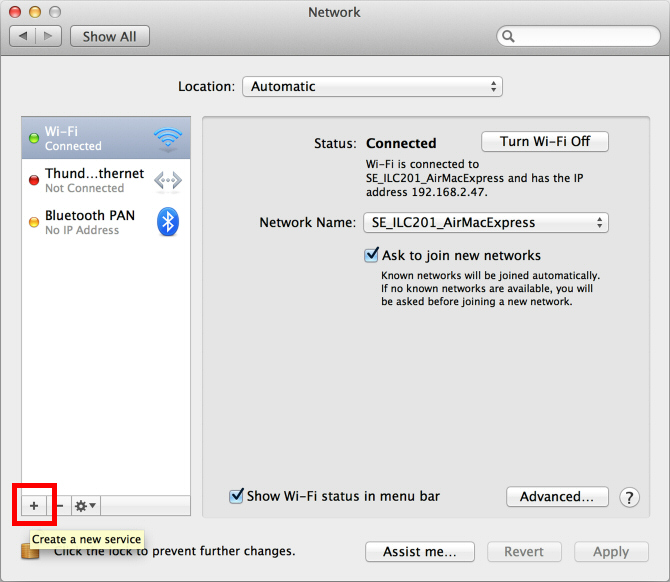
In the Network Preferences window, click on the icon "+" to add a new connection.
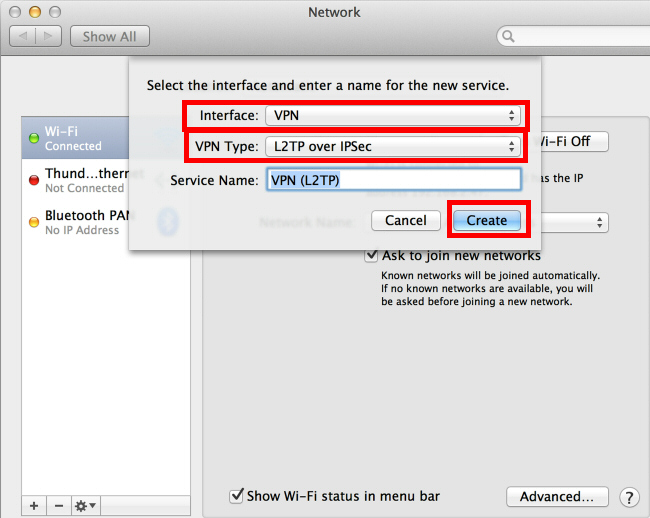
Choose VPN as interface and "L2TP over IPsec" as VPN type. Then click "Create".
Configure the new VPN connection.
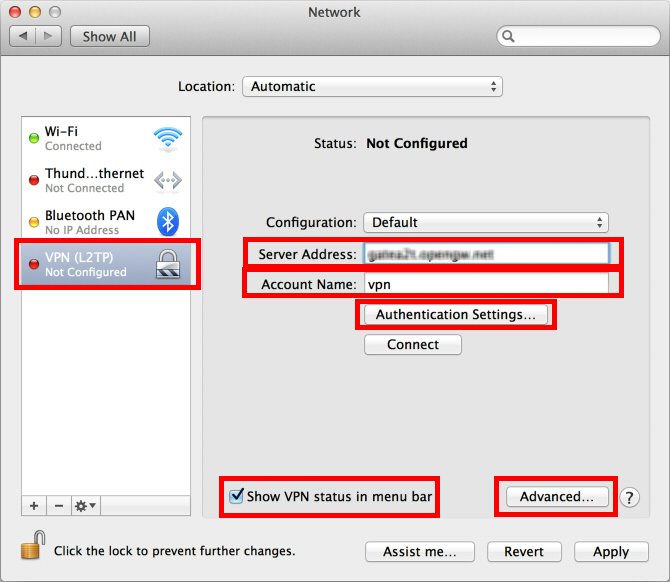
To load the certificates, click on the "Authentication Settings ..." button
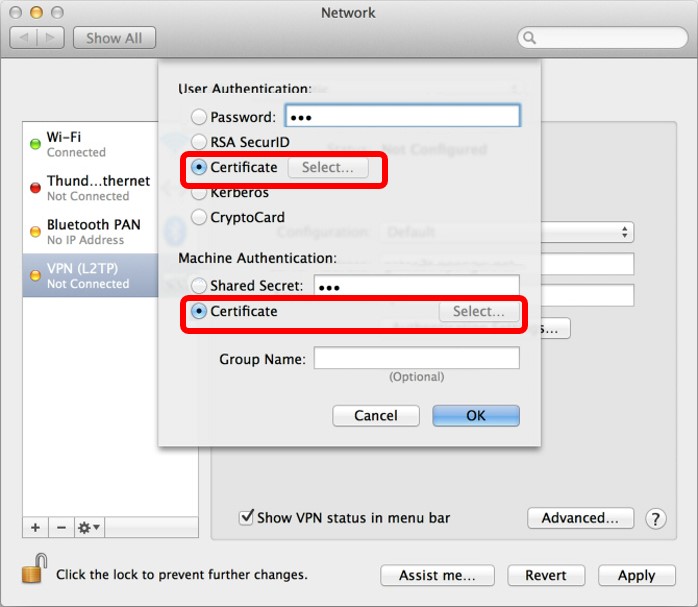
- Load the two corresponding certificates. Then click on the "Advanced ..." button
- Click on OK and close all previous windows. The VPN connection is ready.
- You can now connect to virtual machines in the corresponding VLAN by using private IP network addresses 10.X.X.
- If the connection was not successful, please check if all configuration steps were performed correctly and then contact your Administrator.